Spideroak Is Just Uploading and Not Syncing
What Is SpiderOak?

SpiderOak has 2 functions. Beginning, it'due south an online fill-in service, similar to Carbonite or Crashplan. Second, it does file synchronization much similar Dropbox or Google Drive. It will let you save the same files on multiple computers and synchronize all the changes. The all-time part, however, is the privacy policy. Keep reading to observe out why.
Sign up for a free account to give it a endeavour (limited to 2GB storage).
For this tutorial I'll exist using SpiderOak version five.0.iii.
What Makes SpiderOak More Secure?
SpiderOak uses very strong encryption to transmit and store your data. This helps to protect your files from hackers intercepting or stealing them. But this isn't much different than well-nigh synchronization services. And so what makes SpiderOak different?
SpiderOak uses a strict "Zip Knowledge" policy in which no one but you has the ability to encounter your data. Almost other services take admission to your encryption keys on their servers. This gives their employees the ability to come across what files you're uploading and also gives them the ability to turn over your unencrypted data to police enforcement if they're ever at the receiving end of a subpoena. What's more, having access to your keys on their servers likewise increases the possibility for a hacker to get your stuff if their servers are ever compromised.
SpiderOak is ane of very few services that ensures your information is 100% private when you lot upload it, because it's encrypted with secret keys on your computer that SpiderOak does not have admission to. That, combined with its unique versatility makes it my personal favorite.
Note: This Zero-Noesis policy does not apply if you admission your information through their website or use their mobile app for your phone or tablet.
SpiderOak Features
- Zero-Knowledge policy
- Partly open up source
- HIPAA compliant practices
- Ability to connect through a proxy
- Cross platform
- Limited free data storage
This is also called "Trust No Ane" (TNO) privacy. No one only yourself has the ability to read your data. That includes SpiderOak employees themselves. This is a unique feature for file-sync services to take.
The developers are working toward existence completely open source. Open source ways that anyone tin cleft open the code for their software and see how it works. This is a good thing for privacy and security as it allows for complete accountability. It's not fully open up source yet, but the developers are releasing bits at a time, and accept stated their decision in working toward a fully open source platform.
SpiderOak's Zippo-Knowledge environment was specifically created for HIPAA compliance. Notwithstanding, they are not officially HIPAA certified as of this writing, even though they merits that their technical specifications comply with the standards.
If you like to route your net traffic through an HTTP proxy, SpiderOak will permit you as long every bit it supports SSL.
SpiderOak has clients for Windows, Mac and Linux, assuasive y'all to sync the same files across multiple platforms.
SpiderOak allows 2GB gratis data storage before you accept to first paying. About other services give you more free space than this, but it's a trivial limitation considering the true privacy and security they're offer.
SpiderOak Limitations
- Zero-Knowledge policy does non use to mobile or their website
- Password cannot be recovered
- Not fully open source
There are two situations in which it's possible for SpiderOak employees to proceeds admission to your data. 1) If y'all apply the SpiderOak mobile app on your phone or tablet or 2) if you log into their website to admission your data (this includes the sharing feature). In these situations, your encryption keys are temporarily exposed on their servers and SpiderOak employees technically have the power to come across them, even if they choose not to.
This could be problematic. For instance, if they were always secretly coerced past the government to hand over access to your data, they would have that ability. I really hate to say it, but unfortunately that is actually happening.
However, as long as you never log into the website and never use the mobile app, the Zilch-Noesis policy remains in effect. If you have used the mobile app or website in the past and you decide to go back to Zippo-Knowledge usage, just change your password in the SpiderOak client installed on your computer. Equally long as you never type that new password into their website or into the mobile app, they will not have access to your keys anymore. Yet, if for some reason they stored the encryption keys to files you've already uploaded, then they may nonetheless have those even after you change your password. If you want to retain consummate privacy, I would just recommend never logging into the website or mobile apps to get your data.
As a side-effect of Zippo-Noesis, your password can never be recovered if you lose it. This is a problem inherent to consummate privacy. So make certain you don't lose your password or else the data on their servers will be lost to yous forever. SpiderOak does provide the ability to create a password hint in case yous forget. Simply as a purist, I would recommend avoiding that feature.
While the developers are working toward a fully open source platform, it has not happened yet as of this writing. Nevertheless, because their determination to make it so and their openness and transparency thus far, I experience safe trusting that their product is as private and secure as they tout.
SpiderOak Technical Specifications
- AES256 and HMAC-SHA256 used for encryption
- Nested key scopes – uses different encryption keys on a per folder and file version basis to allow secure sharing of individual files/folders
- Your encryption keys are themselves encrypted with your password and a 32-byte salt while stored on their servers
- Includes 3072-chip public/private RSA encryption key pair for new predictable features – not currently existence used as of this writing
- Uses port 443 for internet traffic
How To Install SpiderOak
1. Sign Up and Download SpiderOak
Visit the SpiderOak signup folio. Make full out the signup grade and click Sign Upwards.
If yous have JavaScript disabled, the signup page may non have all the necessary fields. Enable scripts for the site temporarily if yous have issues.
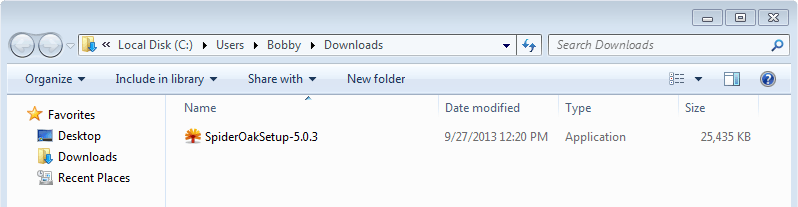
2. Run the installer
Run the file that downloaded if it did not beginning automatically. Yours may have a different version number than y'all see here. Then follow the installation steps.
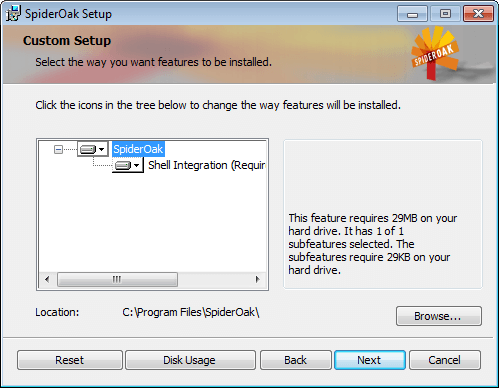
When you see this window, yous may deselect the Shell Integration if yous wish but I would recommend leaving it default. The Crush Integration puts SpiderOak options in the correct click context menu. It tin can be very helpful.
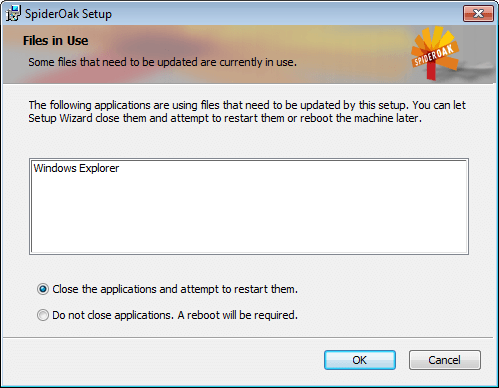
If you run into this window, get out the default choice selected and click OK. Your desktop will disappear for a minute but should come back soon.
Enter your username and password that you created during the signup process then click Next. It will and so go through a process of installing itself on your first device. Information technology may have a few minutes.

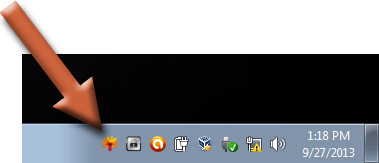
When it'southward done, the SpiderOak window should appear and the icon should now be visible in the organisation tray in the bottom right corner of your screen. That means SpiderOak is running.
3. Install SpiderOak on your other computers
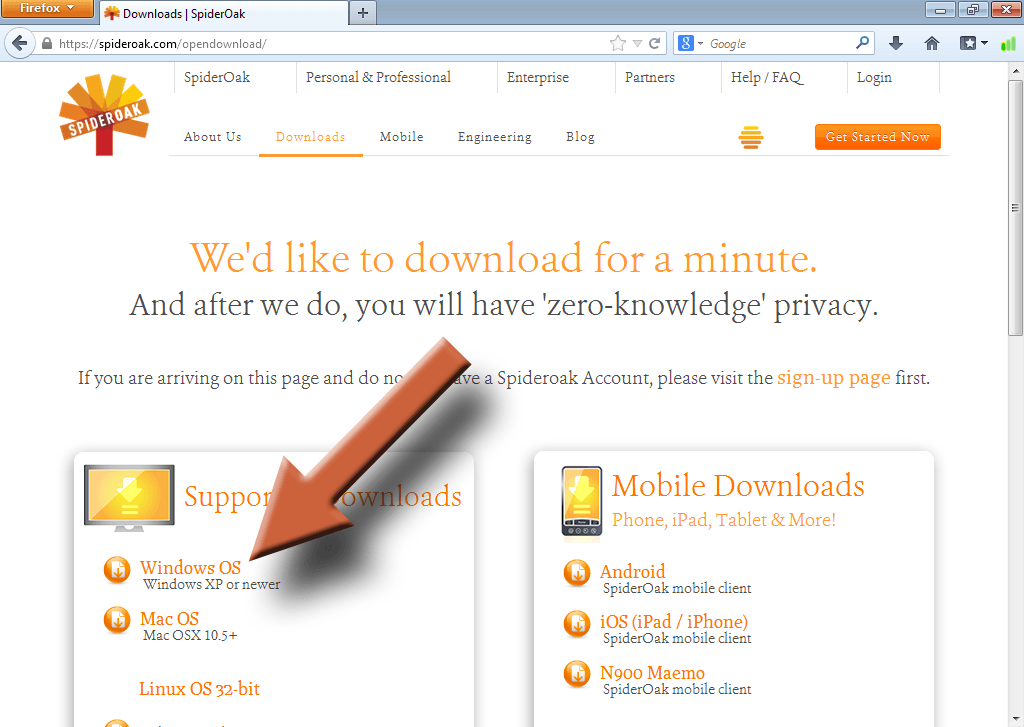
On your other computers, get to the SpiderOak webpage and click on the Downloads link. You exercise not need to get through the sign up process again.
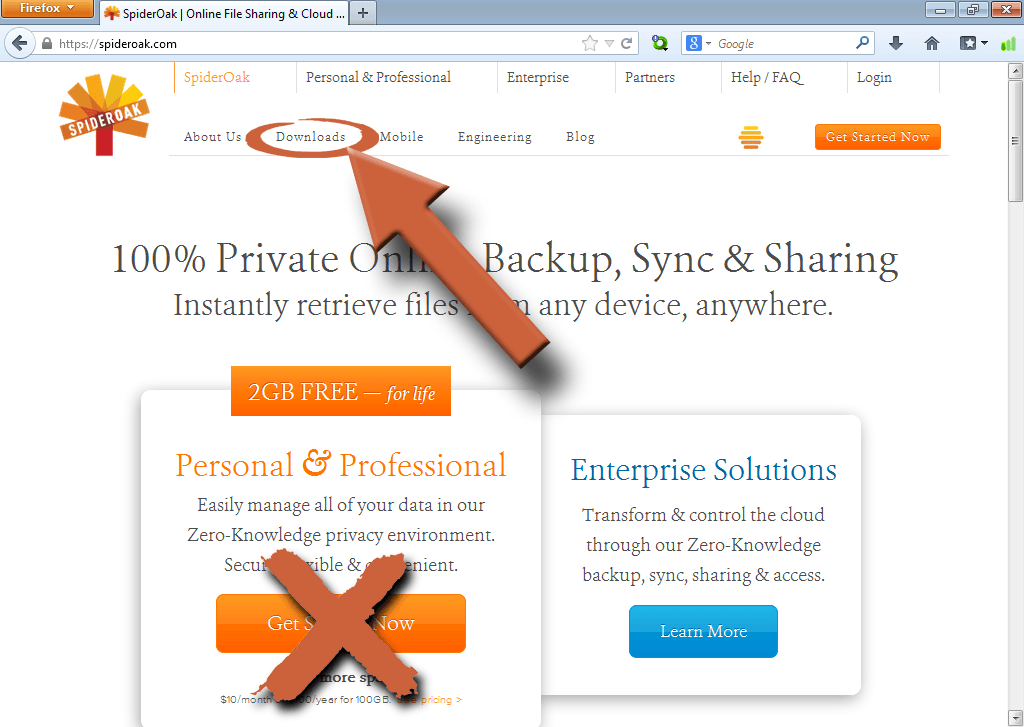
Click the link for your operating organization to download the client. If y'all're unsure then it's probably Windows.
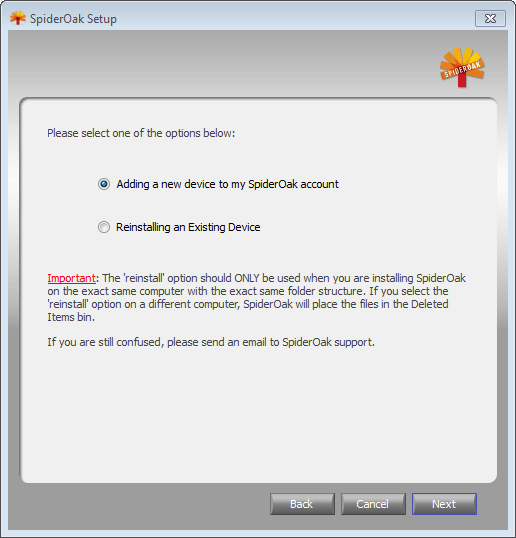
Run the installer like you did on the beginning computer. But this time, afterward logging into the client select Adding a new device to my SpiderOak account and click Side by side.
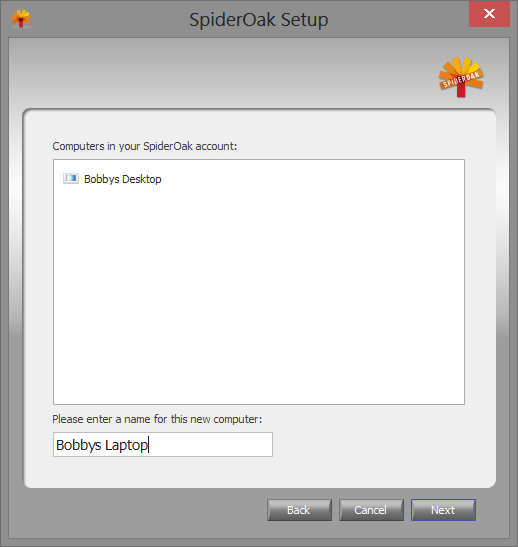
Type a descriptive name for the new reckoner and click Next. It will and so finish setting up your new computer. Practise this for each device on which you lot want to sync your files.
How To Use the SpiderOak Hive
SpiderOak creates what it calls a "Hive" on your estimator. This is merely a fancy name for the default binder that you put files in to synchronize between computers. The Hive is the easiest way to use SpiderOak because information technology does non require any actress configuration at all. Just place any files or folders into the Hive and it will automatically replicate them to all your other computers that accept SpiderOak installed. That includes any computers that you add in the hereafter.
The Hive binder is located in the Documents folder. You should see a shortcut to the Hive on your desktop and in the favorites menu on the left side of your explorer windows.
Create Your Own "Sync" with SpiderOak
The Hive is by far the easiest manner to use SpiderOak. But if y'all have your ain folders you want to sync without placing them in the Hive, you tin do that besides. Such every bit your Documents folder or even a specific folder you created. The procedure is a lot more involved than other services like Dropbox or Cubby considering information technology takes some extra steps to ready up. Merely if yous similar a lot of customizability in your programs then you'll probably appreciate it.
1. Add the folder to SpiderOak's backup
Whatsoever custom folder you desire to sync will accept to be added to the backup first. You'll need to do this on every estimator. For instance, if y'all want to sync all your Documents folders, so you'll take to add together the Documents folder on each computer to the fill-in.
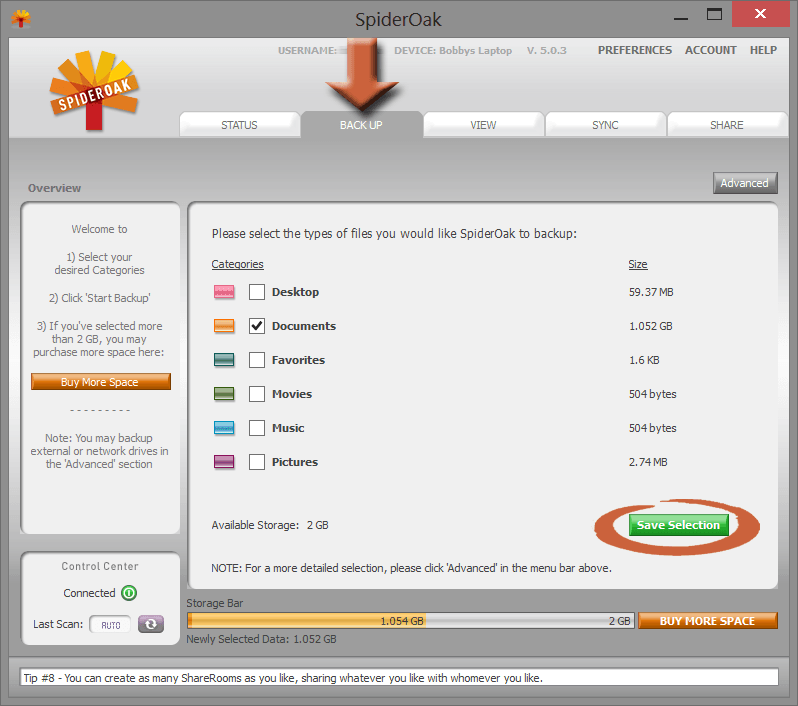
Open SpiderOak and click on the Back UP tab. You'll see a list of pre-defined options you tin select. Check any of the boxes to add that binder to the backup then click Save Selection.
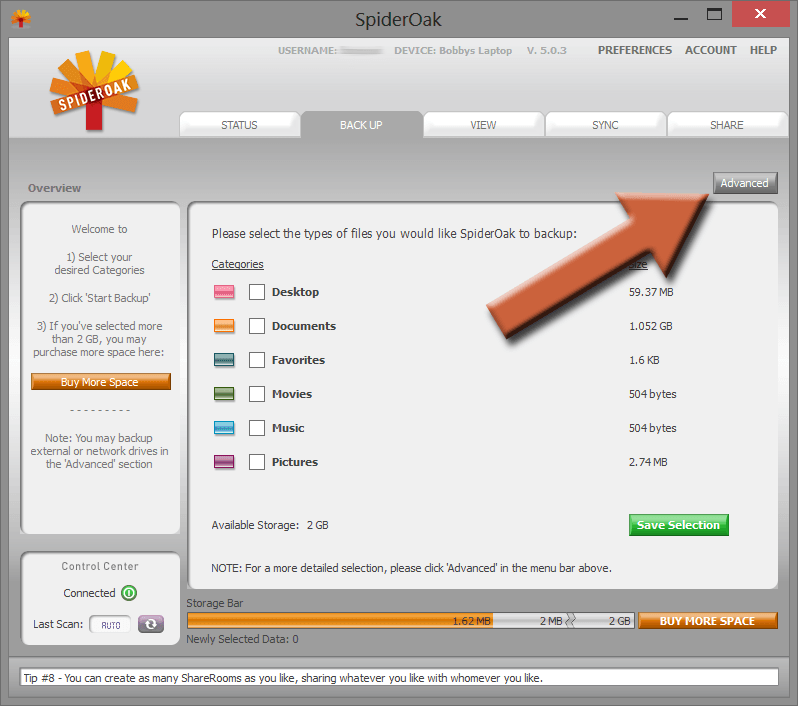
If you want to add a custom folder that's not on the listing, and then select Advanced in the upper correct corner.
Drill down to the folders you want to add, then check their boxes. The storage bar at the bottom volition point how much infinite your selections will use. Recall, you lot have limited space available. Make sure you're non going over your limit, so select Relieve at the superlative. It volition automatically start uploading your selections.

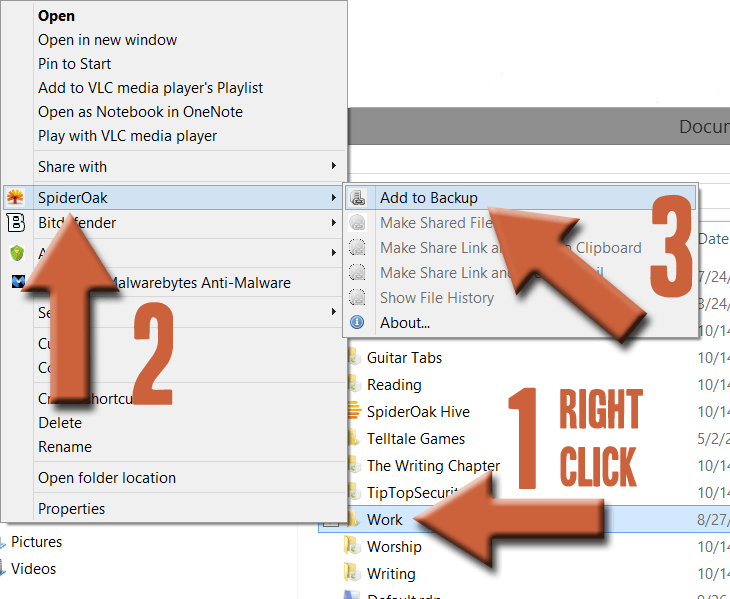
OR, if you opted to include the Shell Extension when y'all installed SpiderOak, you can add a binder to the backup just by right clicking on information technology, opening SpiderOak, so choosing Add together to backup. This volition practise the same thing we just did manually through the plan.
2. Create your custom "Sync"
In one case you accept all your folders added to the backup, nosotros demand to tell SpiderOak which ones to sync to which computers.
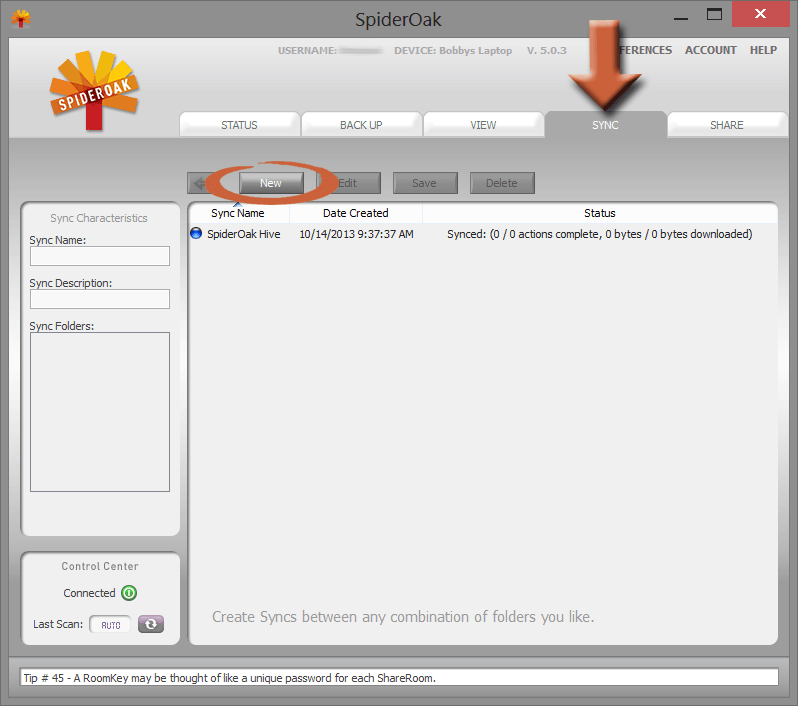
Open SpiderOak and click on the SYNC tab. You can run into that the Hive sync is there by default, but we're going to add our own so click New.
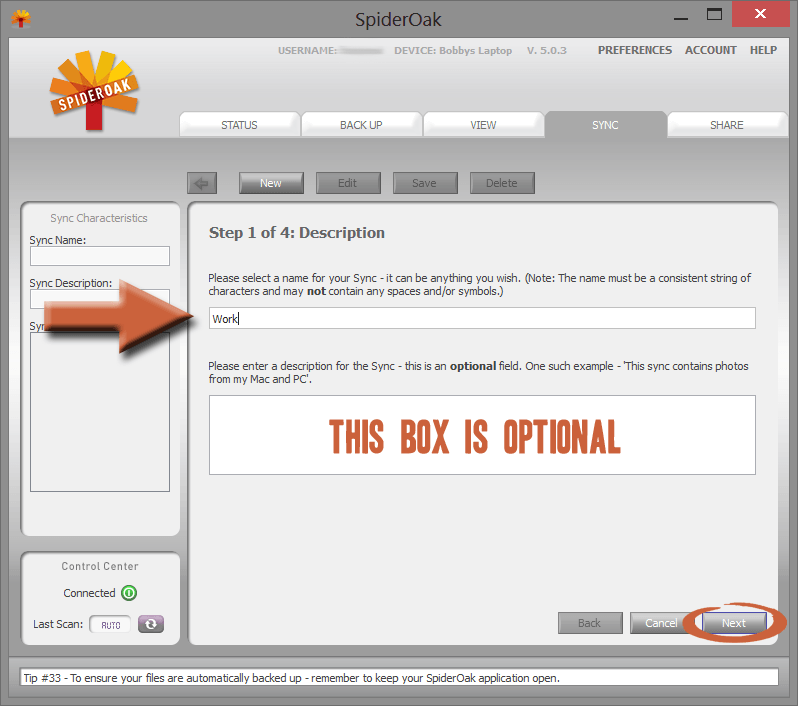
Type a descriptive name for the sync and make full out the description box if you'd like, then click Adjacent. I'm calling mine "Work" because it's going to synchronize my Piece of work folder betwixt my laptop and desktop.
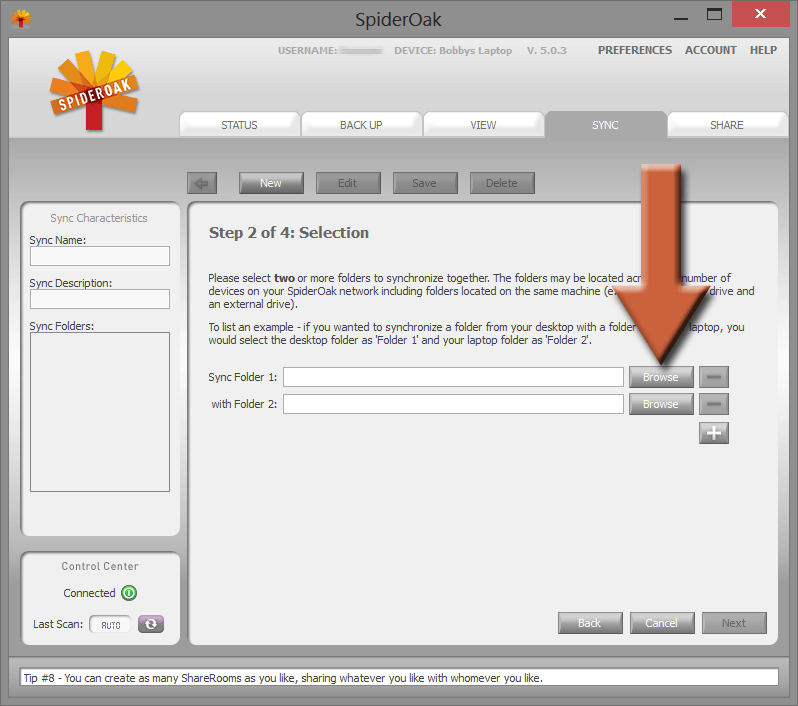
Click Browse next to the first field.
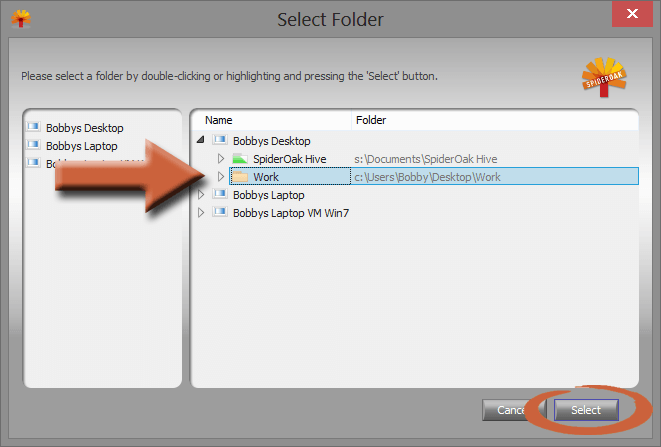
Find the folder you want to synchronize on one of your computers. Highlight the folder and click Select.
Repeat the process for the second entry. You can add another computer past clicking the [+] button underneath. Likewise, to remove a calculator, click the corresponding [-] push. Click Next when you're washed adding folders. The binder names exercise not take to match.
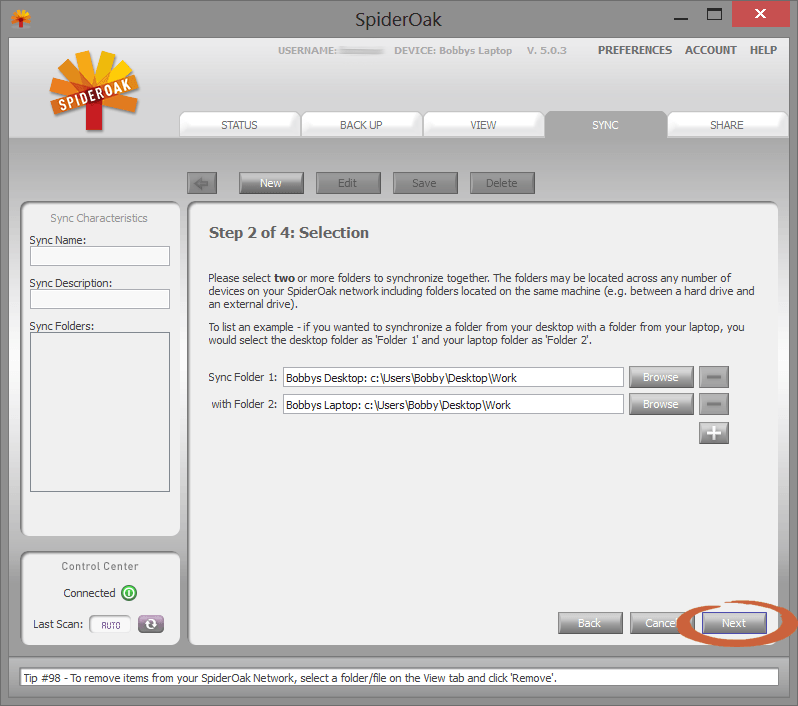
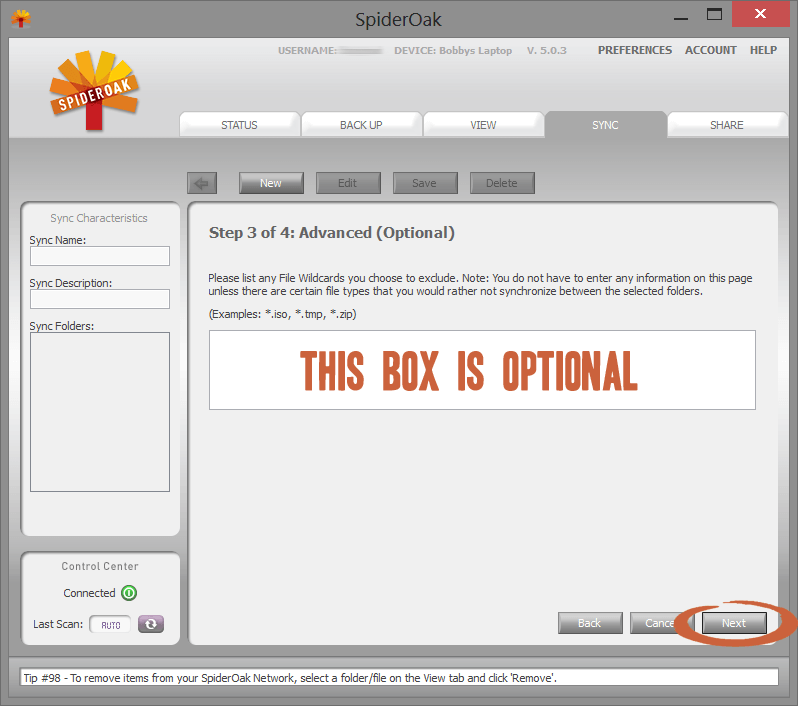
You lot exercise not need to enter anything here unless you desire to prevent sure types of files from existence synchronized, specified by file extension. For instance, if you lot have some large ISO files in the folder that don't demand to exist synced between computers, you can add "*.iso" and it volition ignore them. You volition most probable be leaving this option blank. Click Adjacent when you lot're washed.
Verify the settings are correct then click Beginning Sync.

You'll now encounter your custom Sync in the list and it will begin synchronizing right away. To edit the Sync, click the Edit push button. To delete the Sync, click the Delete button.
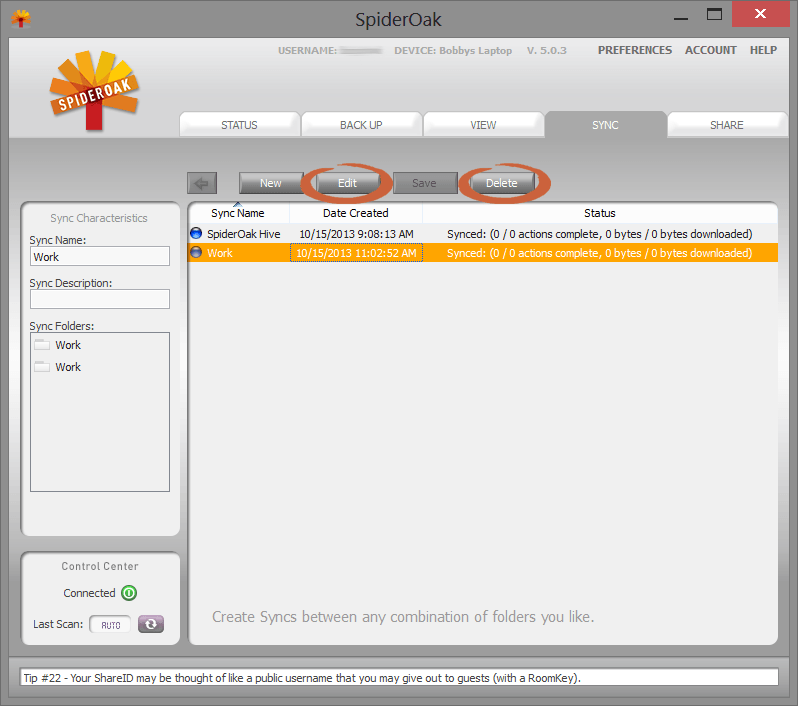
Note: Deleting the Sync will not delete your files from the SpiderOak server or whatsoever of your computers. It only stops the computers from synchronizing.
How To Delete Files from SpiderOak
If you find yourself running out of space, or you lot just don't want your files backed upwards anymore, you'll need to manually delete them from their servers. Just deleting the Sync you created will non delete the files from SpiderOak.
First, you should delete or modify whatever Syncs that are using the files yous want to delete. Click the SYNC tab and select the correct Sync, then Delete or Edit.
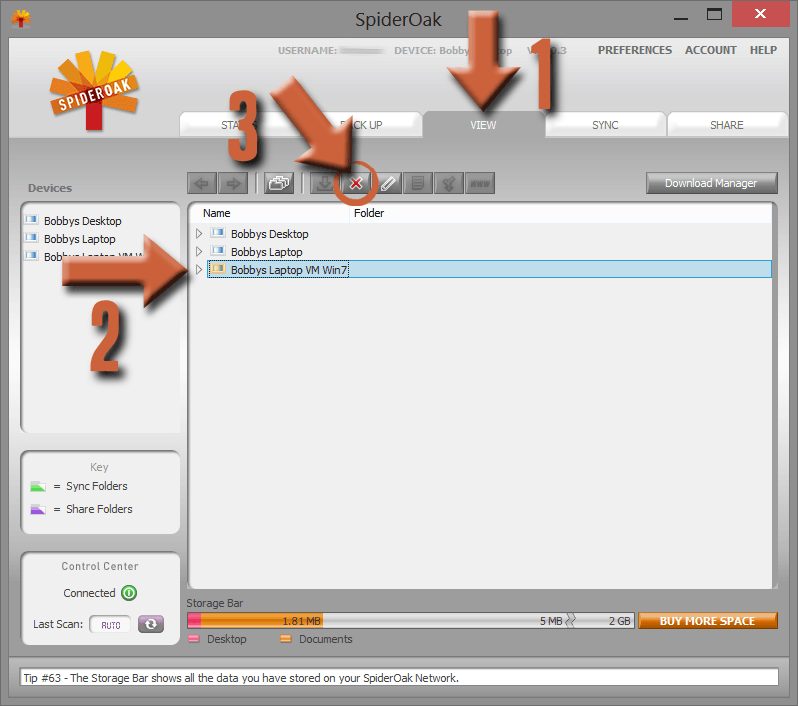
Click the VIEW tab. Drill downwardly the the folder you want to delete from the SpiderOak servers. Highlight the folder and click the crimson X at the summit ("Remove").
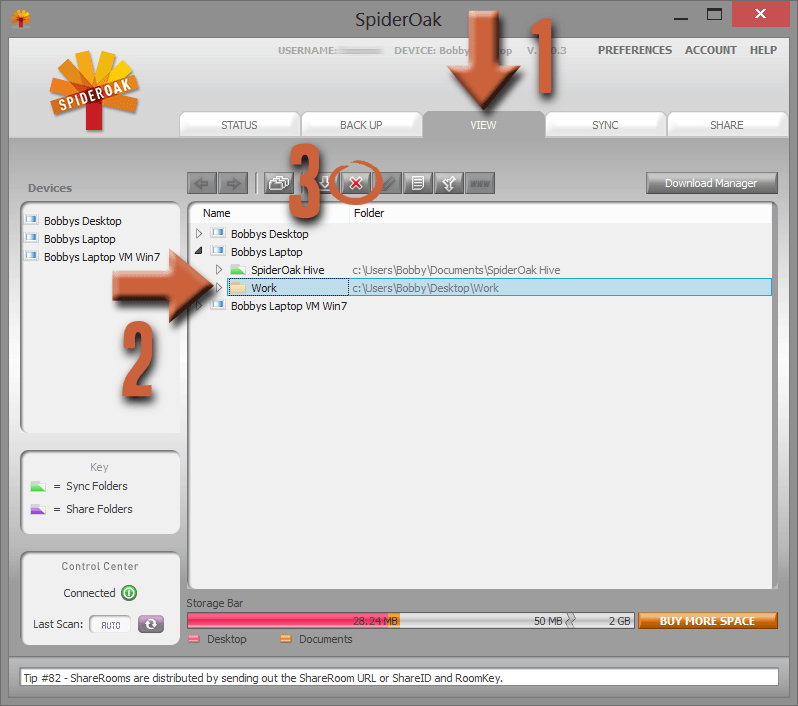
Note: You can only delete folders from the computer that created the fill-in. If the X button is grayed out information technology'south considering you lot're trying to delete it from the wrong computer.
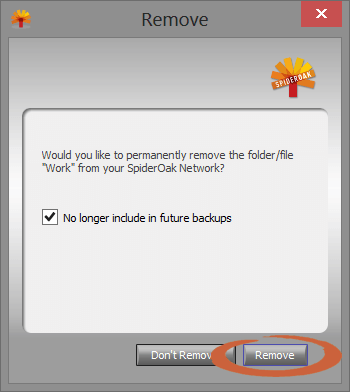
Click Remove. The files will then be removed from SpiderOak's servers. Brand sure that No longer include in future backups is checked or else making a change to that binder will cause it to be backed upwards again.
You'll need to repeat this for every estimator that was syncing those folders. Because when you remove them from the server on one computer, they volition yet get automatically backed up on the other computers. The space will not be freed up until you lot tell every computer to stop backing up that binder.
Note: Removing the files from SpiderOak will not delete the files on any of your computers.
How To Remove a Device from SpiderOak
Beginning, uninstall SpiderOak from the device yous desire to remove. You cannot remove the device if it'south still running SpiderOak.
Open SpiderOak on one of the other devices in your SpiderOak network. Select the VIEW tab, highlight the device you want to remove, then click the ruddy Ten.
Click Side by side to remove the device.
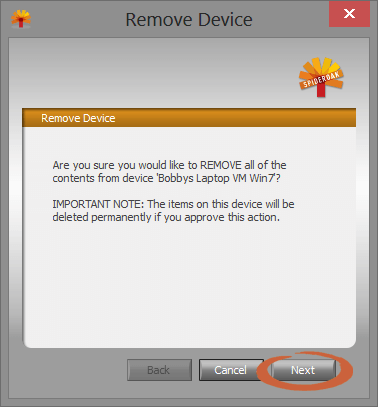
Click Finish and the device will be removed soon. This will besides delete all that computer's backed up data on the SpiderOak servers.

Annotation: If y'all did non uninstall SpiderOak on the device yous removed, it volition not be able to connect to the SpiderOak servers it you kickoff it upward again. If you're removing the device to add it to a different SpiderOak business relationship, come across the this section.
Sharing Files with SpiderOak
SpiderOak provides a sharing feature so you tin can let others see and download your files. But the process is different depending on whether you desire to share an entire folder or just individual files. The people you share with do not take to have a SpiderOak account.
How to share folders with SpiderOak
Offset, brand sure the folder(s) you want to share are backed up to SpiderOak in the Backup tab.
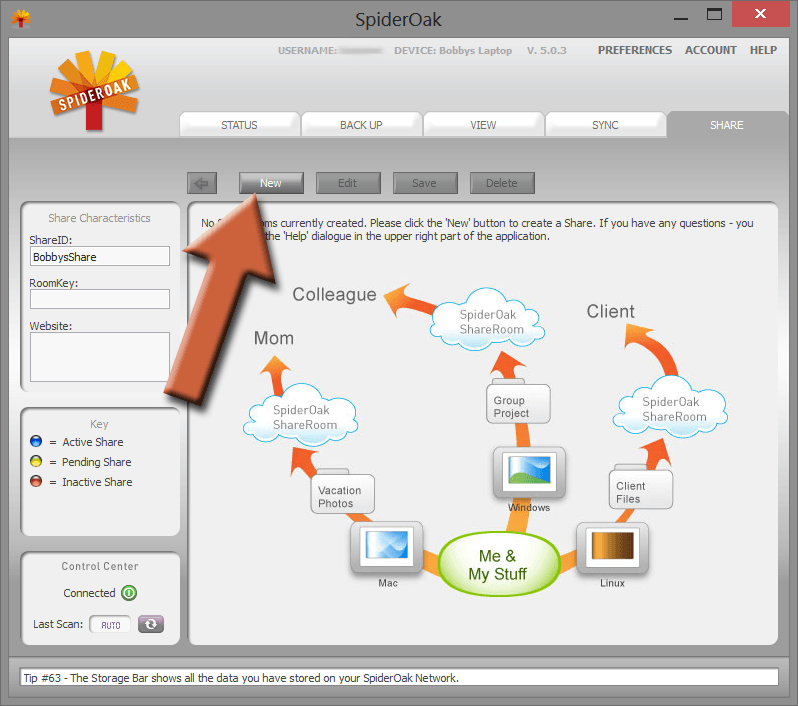
When y'all're fix to share a folder, click on the SHARE tab. It will prompt y'all for a ShareID. This volition be unique to you, no 1 else using SpiderOak can have the same ShareID. When yous're done, click Next.
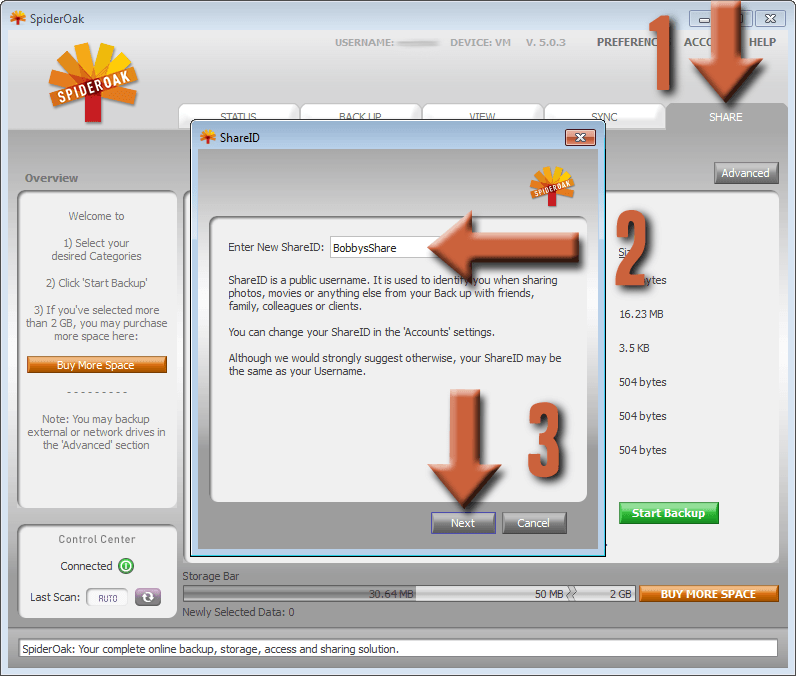
Security Note: Exercise not employ your SpiderOak business relationship name as your ShareID. Anyone will be able to see your ShareID so it's best if it's not a piece of information that can exist used to hack your account. If you want to alter your ShareID, click Account in the upper right corner then select Edit side by side to "Current ShareID".
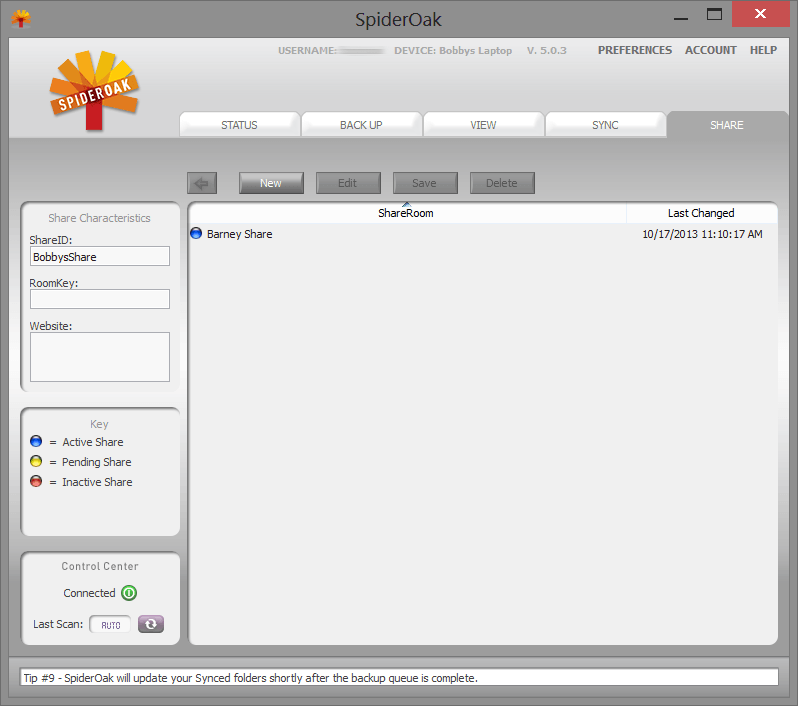
Click New to create a new share.
I'g going to create a share for my friend Barney. In the offset box, enter a proper name for the new ShareRoom (for your use only). In the 2nd box, create a RoomKey (used to gain admission to the ShareRoom). In the third box, create a strong password. And then click Next.

The RoomKey is non a real countersign – it'south actually shown plain in the URL (accost) of the ShareRoom. Adding an bodily password is the but way to protect the share from hackers and snoopers.
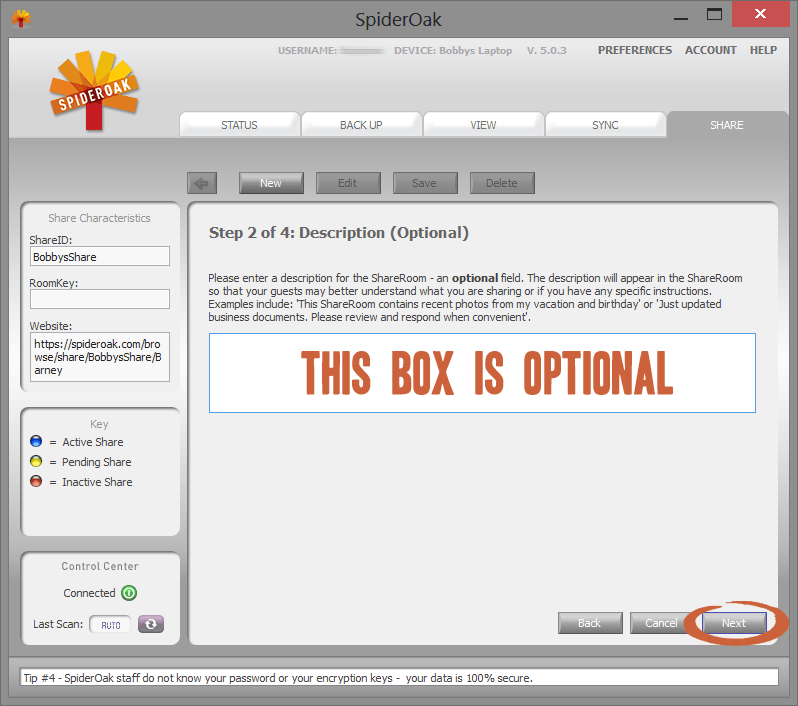
Type an optional clarification for the ShareRoom and click Next.
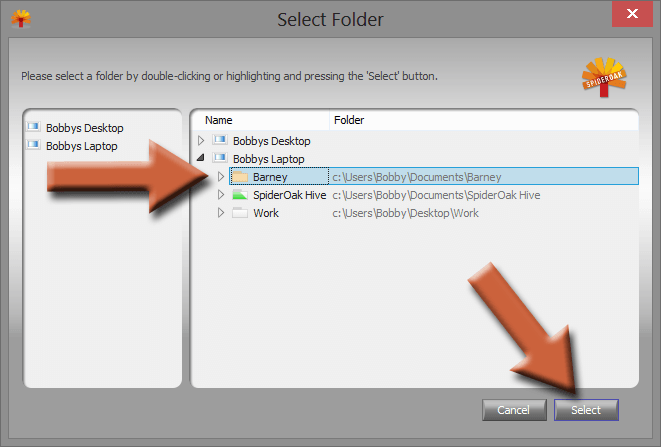
Click Browse to observe the folder y'all desire to share.

Discover the folder you want to share so highlight information technology and click Select.
If you lot want to add another binder to the ShareRoom, click the [+] push button, or else click Next.
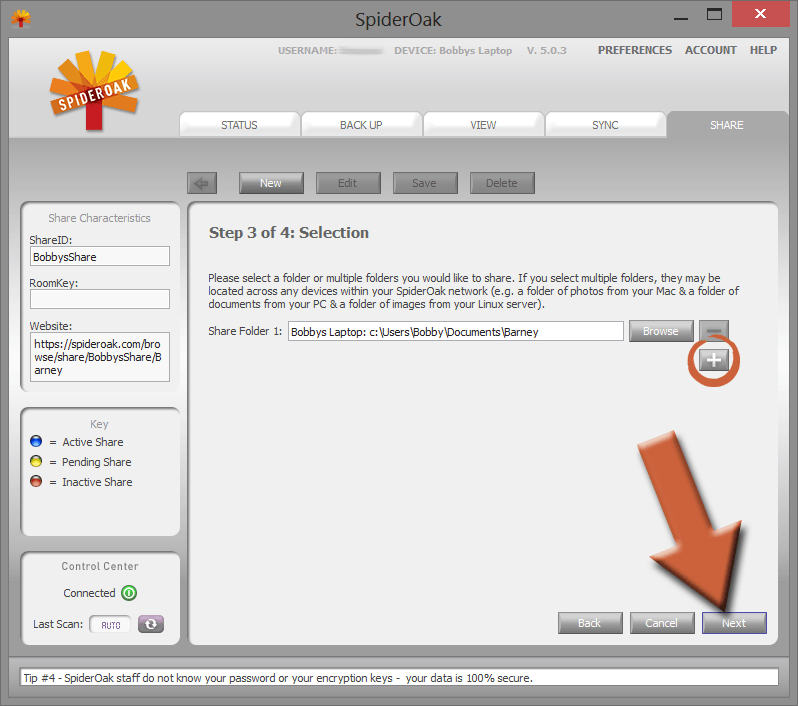
Make sure the configuration is correct so click Start Share.

Your new ShareRoom volition now appear in the list. You can modify or delete it by clicking on the ShareRoom and then using the buttons at the superlative.
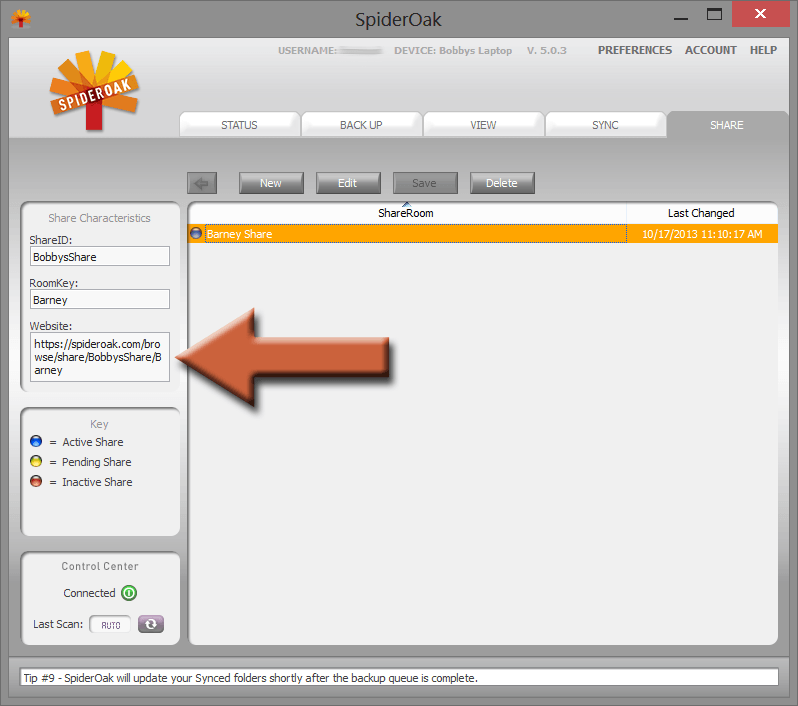
How to access the ShareRoom in a browser
The easiest manner to requite someone admission to the ShareRoom is past giving them the direct web address. The address is shown in the left pane when you lot highlight the ShareRoom. Re-create/paste the address and give information technology to whoever you want to have access. If at that place is no password specified on the business relationship, it will accept you lot directly to the ShareRoom. If at that place is a password, it will prompt you for it.
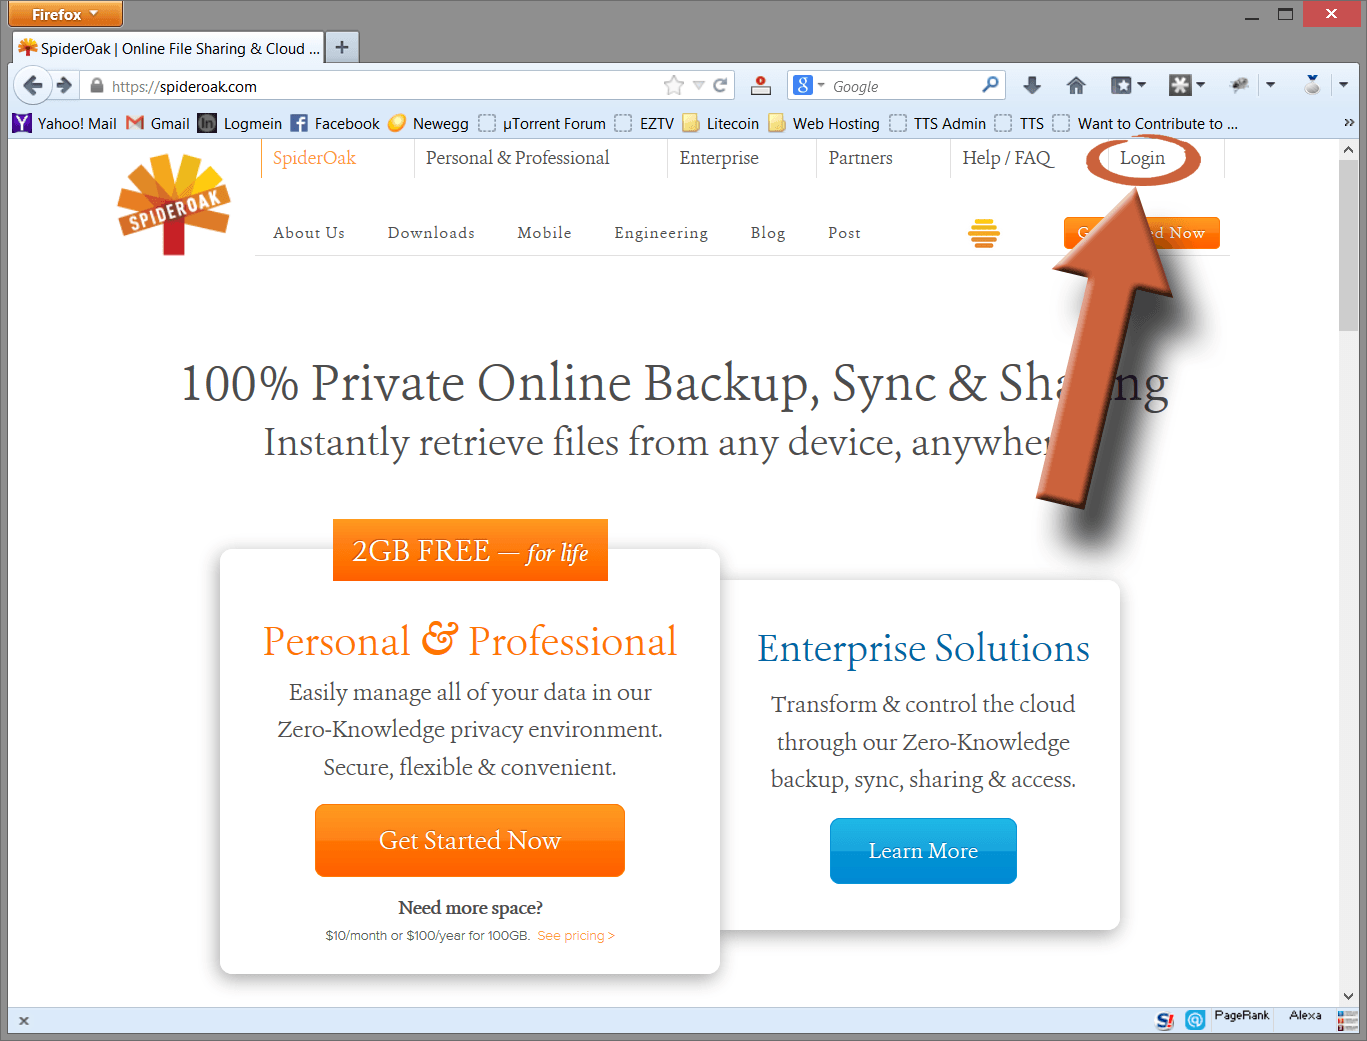
The other mode is to become through the SpiderOak website. Go to https://spideroak.com then click Login.
Curlicue down and click Access A SHAREROOM.
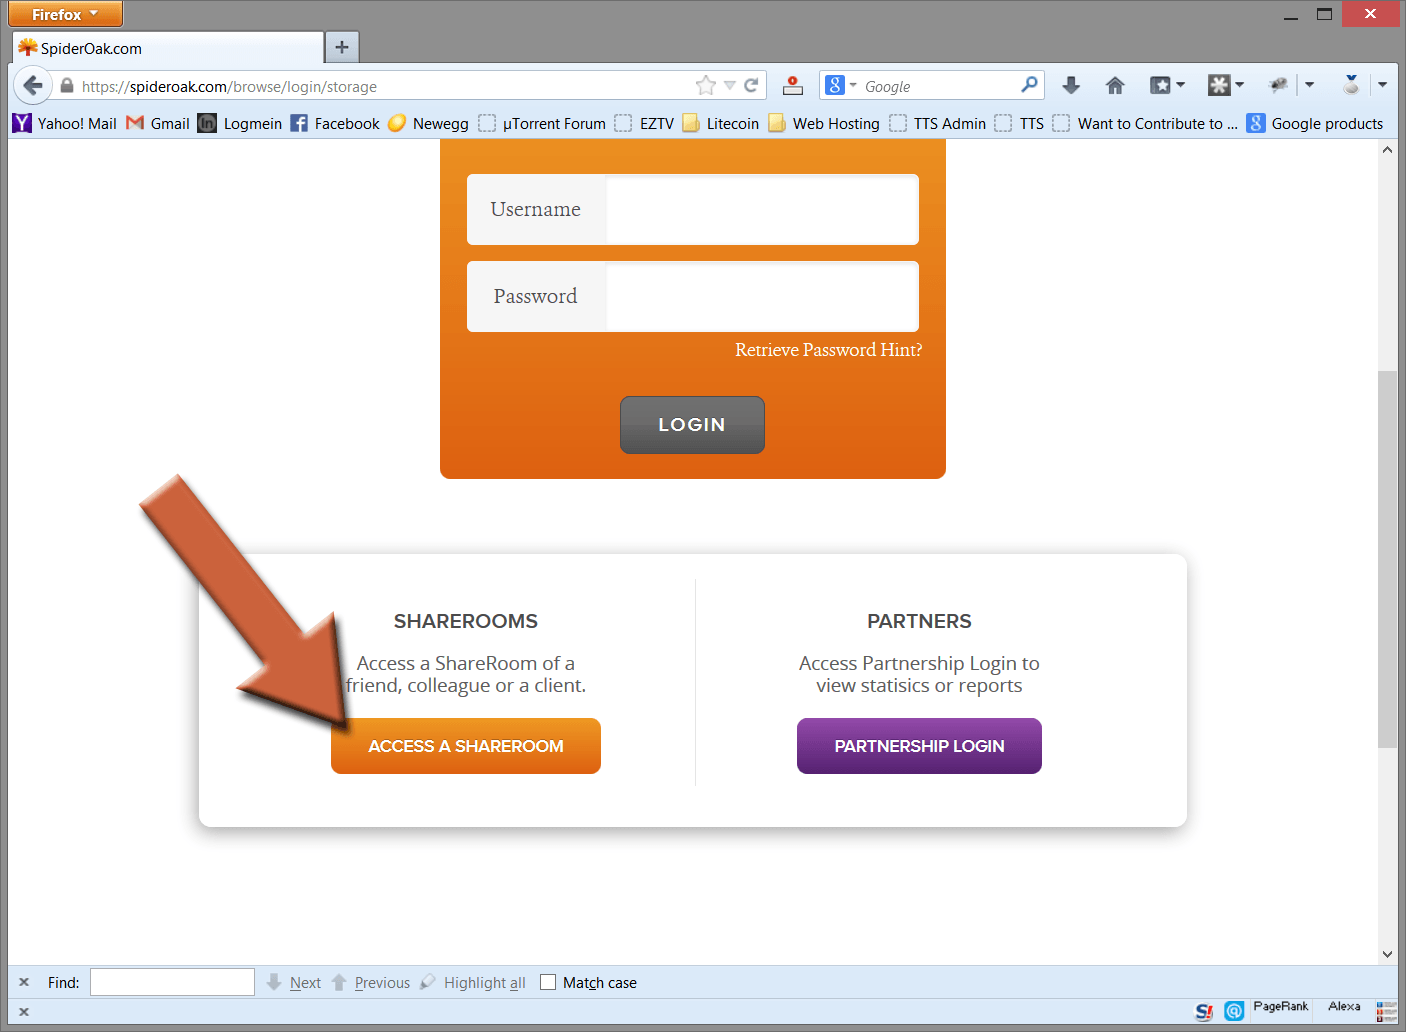
Type in the ShareID and RoomKey then click Login. If there's a password on the ShareRoom, it will prompt for it before proceeding.

Yous will then see the list of folders that are being shared. To download a file, open one of the folders and then click on the file.

How to share individual files with SpiderOak
Select the VIEW tab, drill down to the file you want to share, so click the WWW button.

A window will appear that shows you lot the new web accost to that file. Copy/paste the entire address (all the gibberish, also) and send it to whoever y'all want to have it. When they get to that address, information technology volition prompt them to download the file.
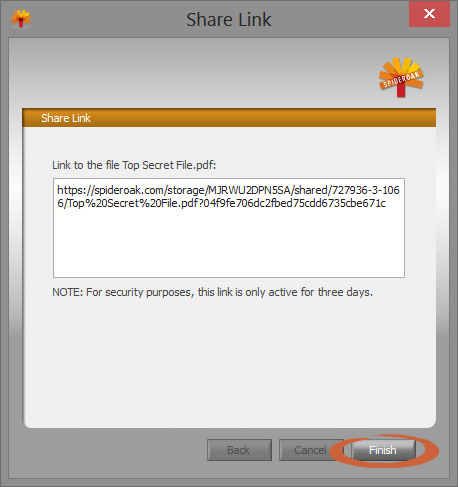
Annotation: The link it generates will merely be good for three days. Make sure the recipient of the file knows that.
How To Alter Your SpiderOak Account
As far as I can meet, SpiderOak does not provide a way to change the business relationship your computer is using once you set information technology up. Even if you lot uninstall/reinstall SpiderOak it will use the same business relationship you lot used earlier. Here is the just solution I've found.
Beginning, uninstall SpiderOak. Then navigate to the following directory in Windows 7 and viii:
C:\Users\%username%\AppData\Roaming\
Delete the "SpiderOak" folder inside, and so reinstall SpiderOak. It should now prompt for the business relationship login.
SpiderOak Tips
- You lot can utilise SpiderOak'southward backup feature by itself and it works well equally an offline fill-in solution, even if you lot never create your own Sync
Gratuitous SpiderOak Account
Sign upward for a free account to give it a try (express to 2GB storage).
Source: https://tiptopsecurity.com/how-to-use-spideroak-to-securely-synchronize-your-files-between-computers/
0 Response to "Spideroak Is Just Uploading and Not Syncing"
Post a Comment